How to Measure for a Chimney Cap: You Can Do It!
23 Jun 2026

Guessing your chimney cap size can be a timely and costly mistake. A chimney cap that is too small simply won't fit, and one that is too large can lead to dangerous drafts, water pooling on your chimney crown, or a chimney cap that easily blows off in high winds, not to mention the frustration and expense that goes along with it.
Measuring for a chimney cap can be easy once you know what and where to measure from. Whether you are capping a single clay tile or protecting a massive multi-flue masonry chimney, our guide below will walk you through exactly how to get the perfect fit. Once you have your dimensions, you can easily find the right chimney cap from our wide selection of Made in USA stainless steel and copper chimney caps.
Preparation & Safety First
Before heading up to the roof or ladder, make sure you have the right tools.
- Tools Required: A tape measure, notebook, pen, and heavy-duty work gloves (terra cotta tiles and masonry can be sharp around the edges).
- Safety Warning: Always exercise extreme caution when working on a roof. Ensure your ladder is properly secured on flat ground, wear slip-resistant shoes, and avoid going up if the roof is wet, icy, or excessively steep. If you are uncomfortable with heights, hire a local chimney sweep to get the measurements for you.
Step 1: Identify Your Mount Type
Before measuring anything, you need to determine which type of chimney cap you actually need.
-
Single-Flue (Tile Mount): These caps attach directly to the clay terra cotta tile that extends above the concrete top of your chimney.

- Single-Flue (Liner Mount): These caps attach directly to the stainless steel chimney liner top plate or chimney liner.

-
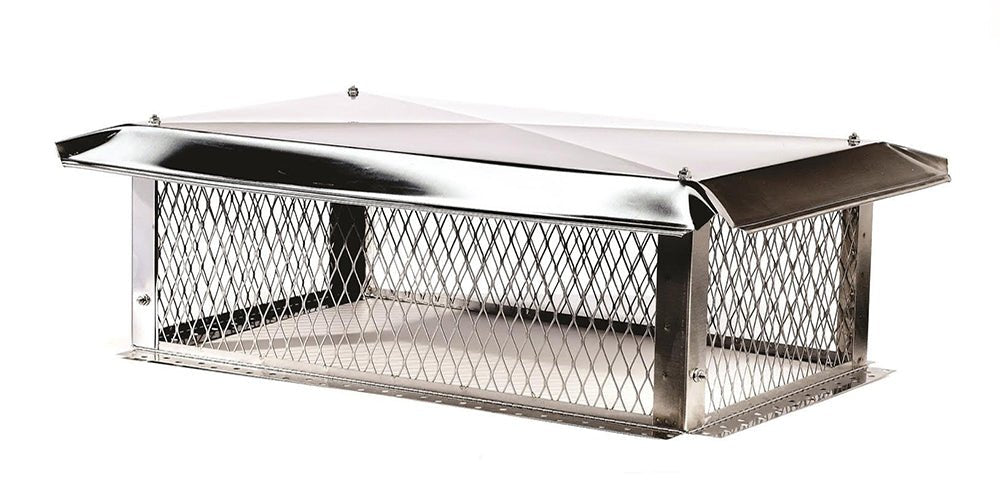
Multi-Flue (Top Mount): A top-mounted chimney cap will bolt directily into the top of the chimney crown and will cover most of the chimney crown and all of the chimney flues.
-
Multi-Flue (Crown Mount with Skirt): If you have multiple flues close together, or if your clay tiles are flush with the concrete, you might have or need need a crown-mounted cap with a skirt. These bolt directly into the side of the concrete crown or chimney chase and cover everything underneath them, overlapping the sides of the top of the chimney.

Step 2: Measuring for a Single-Flue Cap
If you are attaching a cap directly to an extending clay tile, precision is key. Do not measure the inside of the hole where the smoke comes out—you need the exterior dimensions.
- Measure the Outside Length: Place your tape measure on the outside edge of the clay tile and pull it straight across to the opposite outside edge. Write this number down.
- Measure the Outside Width: Repeat the process for the other two sides to get your exact outside width.
- Measure the Flue Height: Measure how far the clay tile extends above the concrete crown. You need at least 1 inch of exposed, structurally sound tile to securely attach a standard pressure-screw cap.
- Note the Shape: Record whether your flue is square, rectangular, round, or oval. Standard caps offer a bit of wiggle room, but the base shape must match.
Step 3: Measuring for a Multi-Flue (Top Mount) Cap
Multi-flue caps sit directly on the concrete crown. Because these often require custom fabrication, getting accurate dimensions is crucial for a watertight seal.
- Measure the Crown Footprint: Measure the total overall length and width of the concrete chimney crown (the flat cement surface at the very top of the brickwork).
- Measure the Flue Footprint: Imagine a box drawn around all of your extending clay tiles. Measure the total length and width of this entire area.
- Calculate Your Flange Clearance: You will need flat concrete space to drill and mount the flanges of the cap. Subtract your flue footprint from your crown footprint. You generally need at least 1.5 to 2 inches of flat concrete on all four sides of the flues to successfully mount a multi-flue cap.
- Measure the Tallest Flue (Critical Step): Measure from the flat concrete crown up to the top of your highest clay tile. The screen height of your new cap must be at least 5 inches taller than your highest flue. If the cap sits too close to the flue opening, it will restrict the draft and cause dangerous carbon monoxide to back up into your home.
Step 4: Measuring for a Multi-Flue (Outside Mount) Cap With Skirt
Multi-flue caps with a skirt overlap the concrete crown or top of the chimney chase.
- Measure the Chimney or Chimney Chase Footprint: Measure the outside overall length and width of the masonry chimney or chimney chase.
- Measuring Tip: Add 1/8 inch to 1/4 inch to your final length and width measurements. This adds a small buffer that accounts for uneven brickwork or chimney chases that might not be square.
- Determine Your Skirt Length: The skirt is the metal that drops down the side of the chimney and covers the upper brickwork or top of the chimney chase from the elements. Determine how far down the side of the chimney you want the skirt to hang. Our standard length is 3 inches.
- Calculate the Screen Height: A proper screen has a height at least 6 inches of vertical clearance from between the top of your highest flue tile and the cap's lid. This is slightly larger than the standard 5-inch rule and is required to prevent draft restrictions.
Common Measuring Mistakes to Avoid
- Measuring the inside hole: If your cap fits over the outside of the tile, measure the outside dimensions. Inside dimensions will result in a cap that is far too small.
- Ignoring obstructions: Note any weird masonry steps, nearby antennas, or severe slopes on your crown. If your crown isn't perfectly flat, a standard multi-flue cap won't sit flush.
- Forgetting the 6-inch rule: Failing to account for the height of the tallest flue on a multi-flue setup is the number one cause of draft issues after installation.
Next Steps: Find Your Perfect Fit
Once you have your dimensions written down, you are ready to protect your chimney from weather, debris, and wildlife.
- If your measurements match standard sizes: Shop our complete line of heavy-duty stainless steel and premium copper chimney caps, proudly made in the USA.
- If you have unique dimensions: Don't try to force a standard cap onto a weirdly shaped chimney. We specialize in custom builds made with your exact dimensions. Our USA-based fabrication team will build a heavy-duty cap perfectly tailored to your home.
Featured Products
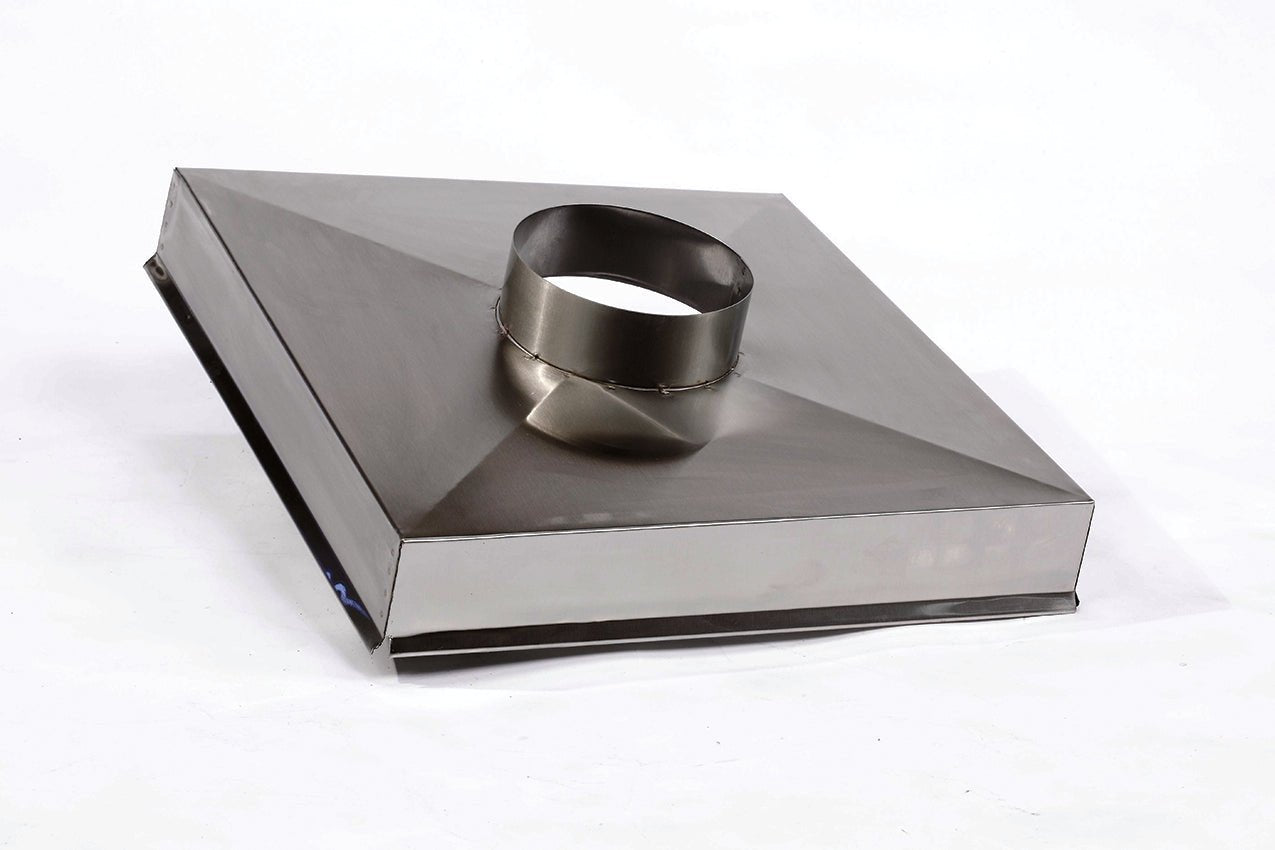

Stainless Steel Chimney Chase Cover | Custom Options
A chimney chase cover is the most critical barrier protecting your chimney's interior from the elements. Standard chimney chase covers are made from cheap galvanized metal that quickly rusts, leading to leaks, stains on your siding or roof, and expensive repairs to the chimney...
Standard Sizes Stainless Steel Chimney Chase Cover
A chimney chase cover is the most critical barrier protecting your chimney's interior from the elements. Standard chimney chase covers are made from cheap galvanized metal that quickly rusts, leading to leaks, stains on your siding or roof, and expensive repairs to the chimney...
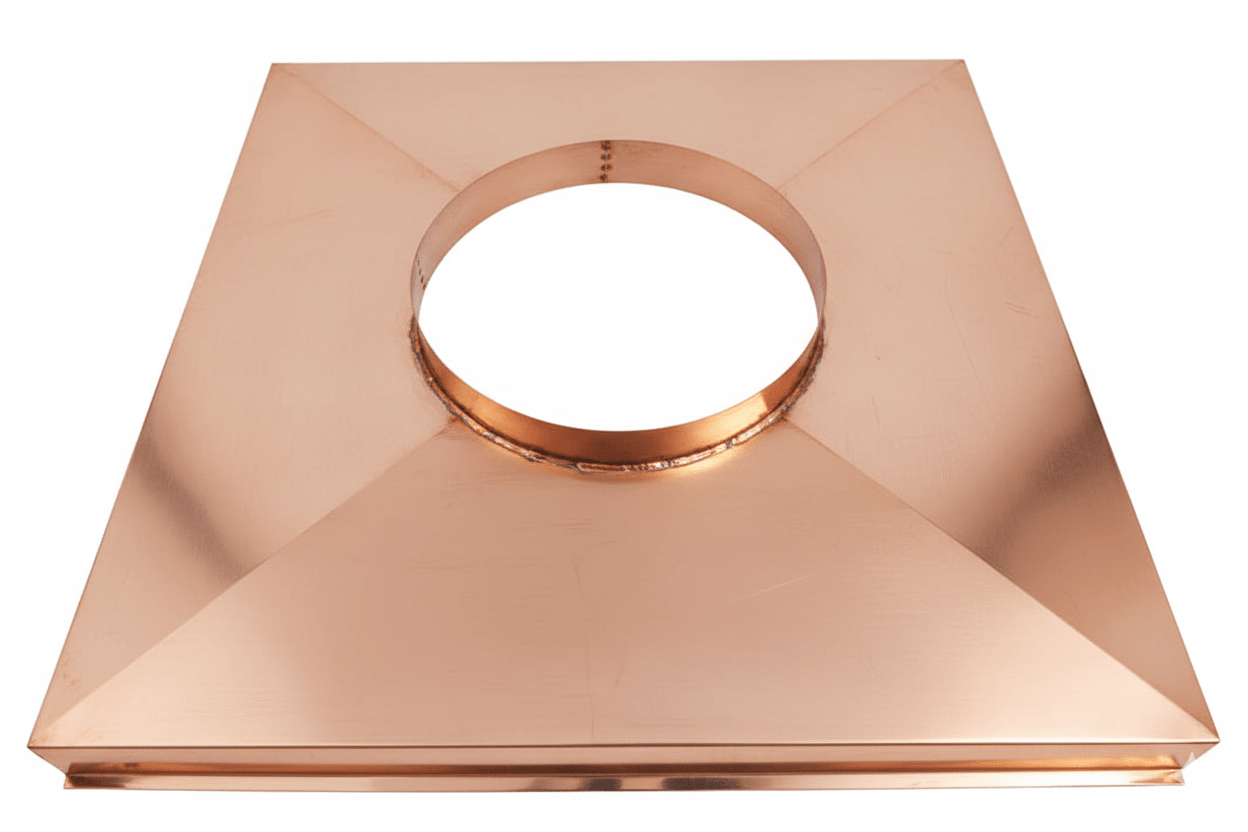

Copper Chase Cover Custom Options
A chimney chase cover is the most critical barrier protecting your chimney's interior from the elements. Most chimney chase covers are made from cheap galvanized metal that quickly rusts, leading to leaks, stains on your siding or roof, leading to expensive repairs to the...